Table of Contents
We can all agree: editing your own writing can feel like a chore, and spotting your own mistakes is frustratingly tough. It’s easy to miss issues when everything starts blending together.
But don’t worry—by following a simple self-editing checklist, you can improve your writing one clear step at a time. Stick with me, and you’ll soon streamline your editing, catch mistakes faster, and even have some fun along the way.
Ready? Let’s jump into these practical tips.
Key Takeaways
- Use a practical editing checklist covering grammar, style, clarity, and sentence length to polish your writing faster and avoid mistakes.
- Ensure your content structure flows logically from introduction to conclusion; rearrange sections if needed to keep your message clear.
- Every section should back your main idea; remove unrelated content.
- Keep sentences simple, short, and easy to understand; use everyday words instead of fancy language.
- Transition smoothly from one section to another to guide the reader naturally.
- Combine automated grammar tools and manual proofreading for best results.
- Read your content aloud to spot awkward or unnatural phrasing.
- Ask someone honest for feedback, and adjust your checklist accordingly.
- Print and manually mark edits for clarity and to catch issues easily.
- Keep good examples, printable checklists, and helpful editing resources handy to consistently improve your writing.

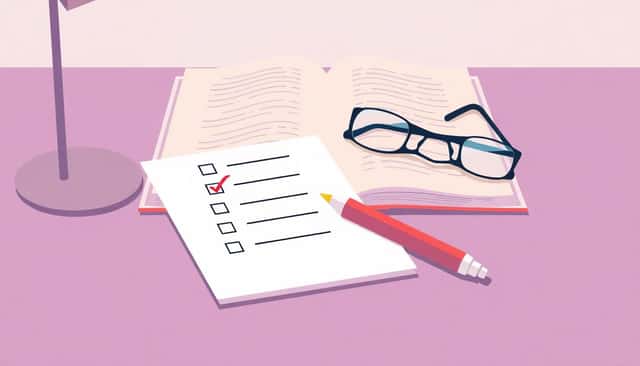
Step 1: Use a Simple Self-Editing Checklist to Improve Your Writing
A good self-editing checklist is basically your secret weapon for making writing clearer, cleaner, and more appealing. Think of it like your grocery list—it’s just a quick rundown of things you definitely don’t want to forget (and saves you from that minor panic of remembering you forgot eggs when half-way home).
A typical self-editing checklist includes points like grammar and punctuation, style consistency, clarity, and sentence structure. By checking these off your list as you go, you’ll make sure your content reads smoothly and isn’t bogged down with distracting errors. Plus, studies show a good editing checklist can actually cut your editing time in half—something we can all appreciate.
If you’re new to self-editing checklists, here’s how you can create your own:
- Grammar and punctuation: Double-check for small errors; don’t blindly trust automated tools like Grammarly—there are many grammar software alternatives available if it’s out of your budget.
- Style and tone: Ensure your voice stays consistent, friendly, and approachable throughout the piece.
- Clarity and coherence: Check if your key points are easy to follow and your paragraphs logically flow into each other.
- Sentence length: Keep your sentences short—an average of 14-18 words is ideal to keep attention without overwhelming the reader.
If you like being super organized, you could even use Google Keep to create your checklist and easily refer back to it each time you edit.
Step 2: Check the Overall Structure of Your Content
Imagine a house—no matter how great it looks on the inside, if the layout’s messed up or disorganized, it won’t be an enjoyable place at all. Your content structure works exactly the same way.
Go through your writing and look for the basics: Does it have a clear introduction that tells readers exactly what they’ll get from the piece? Do your subheadings flow logically, building your content from a strong start through a supportive middle and finally ending in a clear conclusion?
Quick tip: If your writing covers topics like publishing a book without an agent or making money on Amazon KDP without writing, put yourself in your reader’s shoes. Do you feel guided smoothly from step to step, or are there unexplained leaps and gaps?
If things feel vague or scattered, rearrange your sections or add clarifying transitions. The reader should always effortlessly know where they’re headed next.
Step 3: Make Sure Each Section Clearly Supports Your Main Message
Ever read something and thought, “Wait…what does this section have to do with anything?” Never let your readers wonder that same thing. Each part of your content should clearly back up your primary point. The moment a section strays, you risk losing your reader’s attention.
Do a clarity check by reading each section and asking yourself, “Does this clearly support my main idea, my title, or my central point?” If the answer is no, it might be time to trim it or rework how it ties into the bigger topic.
Another easy test: Can your subheadings alone guide readers through the main points of your content? Someone who scans quickly through your headings should still get an accurate picture of your overall message.
If you struggle with this, take inspiration online. You get plenty of practice doing this type of check when you write carefully structured content such as how to become a book editor or similar step-by-step guides online. Keep practicing bringing each part back to that central message to sharpen your writing clarity every time.
Step 4: Evaluate Sentence Clarity and Word Choice
Ever read a sentence, squinted your eyes, and thought, “Okay, what did I just read?” If your sentences are confusing, readers will likely bounce away.
To make sure readers don’t struggle, keep sentences short and clear, aiming for about 14 to 18 words on average.
A handy trick is to use readability apps like Hemingway app or Online-Utility.org, which help spot overly complicated sentences, fancy words you don’t need, and even passive voice that slows readers down.
Word choice matters, too; always use everyday language instead of reaching for overly formal-looking words.
As an example, instead of saying “commence,” just keep it straightforward with “start”—simple always wins.
Step 5: Confirm Transitions Between Sections Are Smooth and Logical
Ever driven on a bumpy road where you feel every pothole? That’s exactly what bad transitions between sections feel like to readers.
To avoid rough transitions, always end a section by hinting at what’s coming next, guiding readers naturally from section to section.
You can use phrases like “Let’s move on to…” or “Now that we’ve covered… here’s the next important step.”
Pay attention particularly when writing content with detailed structures like how to write a foreword, where good transitions keep the reader engaged from start to finish.
A quick test: skim your headings alone without paragraphs—if you can still follow your main storyline clearly, you nailed it.
Step 6: Look for Grammar, Spelling, and Punctuation Mistakes
No matter how great your writing is, even one or two grammar slips can hurt your credibility.
Automated tools like Grammarly can help, but they’re not always perfect and can sometimes overlook subtle mistakes or suggest incorrect fixes.
Instead, mix and match tools; for example, if you’re working on a longer manuscript, check out some of these best proofreading software options to catch subtle errors that simpler tools might miss.
Take special care with tricky punctuation like commas and semicolons—misplaced punctuation can completely change your meaning.
After running your favorite checker tool, perform another read-through manually to catch anything technology missed.
Step 7: Read Your Work Aloud to Identify Awkward Wording
It may sound silly, but reading your writing out loud is surprisingly effective.
When reading silently, your brain tends to skip awkward phrasing or fill gaps automatically, but when spoken aloud, you’ll quickly hear anything that’s off.
If you trip up reading something, your readers will likely stumble there, too—rewrite until it feels natural spoken out loud.
An extra helpful tip: Record yourself reading your text aloud, then play it back, focusing just on the sound and flow of your sentences.
Trust me; you’ll be amazed at the awkward phrases you catch and smooth out this way.
Step 8: Ask a Friend or Colleague to Review Your Writing
Ever spent so long looking at your content you no longer really see it? Fresh eyes are priceless at spotting mistakes and suggesting better clarity.
Choose someone straightforward who won’t just praise your work; blunt feedback genuinely improves your content.
To help your reviewer provide actionable feedback, guide them with clear questions like “Does anything feel unclear or hard to follow?” or “Does the intro hook your attention?”.
Constructive criticism from someone honest is incredibly valuable, even if it stings a bit. You’ll quickly learn what’s working and what’s not.
Step 9: Customize Your Self-Editing Checklist Based on Feedback Received
Remember earlier when we set up your self-editing checklist? Well, here’s where it evolves.
After you get feedback from friends or colleagues, use their suggested improvements as new points in your checklist.
This way, your checklist becomes specific to your writing style and weaknesses, helping you improve over time.
For instance, if your reviewer points out repeatedly awkward sentence structures, add “Review sentence fluency and structure” to your checklist.
Keep adjusting your checklist—over time, you’ll naturally stop making certain errors simply because your customized cheat sheet constantly reminds you.
Step 10: Print Your Draft and Mark Areas That Need Improvement
Looking at content on a screen gets tiring, and sometimes our brains slip into autopilot.
Printing your draft and physically marking up changes gives your eyes a fresh angle and helps highlight overlooked issues.
Grab a colorful pen and start making marks on paper; underline confusing sentences, circle typos, or use symbols like arrows to indicate restructuring points.
You’ll visually see your editing progress and quickly spot recurring problems.
Plus, there’s something incredibly satisfying about highlighting, scratching out, and making tangible edits with your hands.
Step 11: Keep Helpful Examples and Printable Checklists Handy for Regular Use
Let’s be honest—we easily forget details, especially when juggling multiple projects.
Keep examples of top-notch writing, printed resources, or even bookmarked websites like alternatives to Grammarly within easy reach.
You can even make your checklist printable. Print out paper copies, laminate, and keep them close by so you can mark tasks off with a dry-erase marker every time you complete your edits.
If you find an especially helpful online post or guide (like this very one), don’t just bookmark it—keep its key points summarized next to your workspace for quick reference.
This habit not only saves time, but it keeps your skills sharp and your content consistently readable.
FAQs
Writers should check for logical structure, clarity of message, grammar and spelling mistakes, smooth section transitions, clear sentences and word choice. Reading aloud and getting feedback from others helps identify areas needing improvement.
Reading your text aloud makes it easier to identify awkward sentences, repetitive wording, and unclear expressions. Hearing your writing out loud reveals patterns, improving overall flow and readability in ways silent reading might miss.
When seeking feedback, clarify the main points you need checked, such as clarity, grammar, or structure. Select someone familiar with your topic or audience, if possible, and clearly communicate your editing goals to receive targeted, actionable comments.
Changing your checklist based on received feedback allows you to consistently address your own frequent mistakes. It helps ensure your editing process remains relevant and effective, saving time and improving your writing quality long-term.