Table of Contents
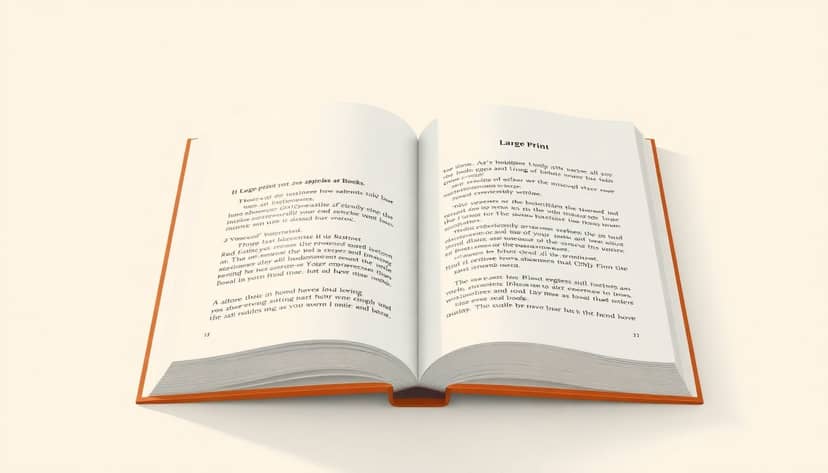
If you’re trying to make a book easier to read in large print, you’re not alone. I’ve done a few conversions where the goal was “bigger text,” but the real work was making sure the layout still felt natural—no weird gaps, no squished lines, and nothing that turns into a blurry mess on paper.
This guide is for people formatting large print books in common tools like Microsoft Word or Adobe InDesign (and it’ll translate to Google Docs too). I’ll walk you through the same decisions I used when I tested a sample chapter through a print-on-demand workflow and then checked the PDF proofs before committing to the full run.
By the end, you’ll know what to set for font size, margins, line spacing, paragraph structure, and even export settings so your large print edition comes out clean and readable.
Key Takeaways
- Use a readable font at 16–18 pt minimum (I usually test 18 pt for comfort) and avoid decorative/cursive styles.
- Set line spacing to 1.5x or double, and use wide margins so the text doesn’t feel cramped.
- Keep high contrast (black/dark text on white or cream). If you use a colored background, test for glare.
- Limit paragraph “wall of text” moments: aim for 3–4 lines per paragraph and use headings/bullets to guide the eye.
- Keep the page visually simple: fewer distractions, consistent spacing, and predictable chapter starts.
- Plan accessibility cues: larger chapter titles, clear section markers, and page numbers that stand out.
- Proof like it matters—print a sample and adjust based on real paper + lighting, not just screen brightness.
How to Format a Large Print Edition
Here’s the real starting point: large print isn’t just “make the font bigger.” It’s a whole layout system that keeps text readable across long sessions.
My baseline settings (the ones I keep coming back to):
- Font size: 16–18 pt minimum (I often test 18 pt first).
- Line spacing: 1.5x for a tighter-but-still-breathable look, or double if the book is heavy on longer passages.
- Margins: wide enough that the text doesn’t feel boxed in. A practical starting point is 0.75–1.0 inch (about 19–25 mm) on most sides, then adjust for binding if you’re printing and trimming.
- Text alignment: left-aligned for body text. Full justification can create weird rivers of space.
In my experience, the fastest way to get “almost right” is to format using styles instead of manually changing every paragraph. In Word, that means updating the Normal style and heading styles. In InDesign, it’s paragraph styles + a master page for headers/footers.
What I noticed during testing: On screen, cream backgrounds look fine. On paper, some creams and tints can increase glare under overhead lighting. So if you’re using anything other than white, don’t guess—make a PDF, export it, and do a quick test print.
If you’re producing a large print edition for print-on-demand, it also helps to plan your export early. If you’re working on the publishing side, you can use this resource on digital printing to understand how production constraints affect what your final PDF should look like.
Choosing the Right Font and Size for Large Print Books
Pick a font that readers can decode quickly. That usually means simple letterforms and consistent spacing.
Fonts I recommend testing first: Arial, Verdana, Times New Roman, and (if your tool supports it cleanly) Georgia. They’re common for a reason: they behave predictably at larger sizes.
Size rule of thumb:
- 16–18 pt for most body text (start at 18 pt if the book is meant to be extra comfortable).
- Heading sizes: aim for headings around 22–26 pt depending on your page size so they’re distinct without looking like posters.
And yes, I’ll say it plainly: avoid decorative, cursive, or overly stylized fonts. Even if they look “pretty,” they can blur together when printed. What looked crisp on my monitor turned into a slightly messy texture on the proof.
Mini case study (what changed after I tested): I once converted a chapter using a rounded sans-serif that looked great on-screen. On the printed sample, the “a” and “e” shapes were harder to tell apart at a distance. I switched to Verdana/Arial-style letterforms and the page immediately felt clearer—less effort, fewer “wait, what did that say?” moments.
Designing Pages for Better Readability and Eye Comfort
Page design is where the book either feels comfortable—or starts working against the reader.
Start with a sensible layout:
- Line spacing: 1.5x or double. If you go double, reduce other spacing so the page doesn’t turn into giant blocks.
- Paragraph spacing: use space before/after sparingly. A common approach is 0 pt space before and 6–10 pt after for body text (then adjust based on your font size).
- Line length: aim for about 50–60 characters per line. If your lines are too long, readers have to track too far across the page. Too short, and it becomes choppy.
Want a practical way to check line length? In Word, you can estimate by checking how many words fit between the margins on a typical line. In InDesign, you can set up a text frame width and keep it consistent across pages using a master page.
Breaking long text blocks matters more than people think. For large print, I aim for paragraphs that don’t exceed 3–4 lines. If you’re writing fiction, that can mean shorter scene paragraphs. If it’s nonfiction, it may mean splitting sections more often, especially around transitions and lists.
Also: keep decorative elements minimal. A subtle border around a sidebar is fine. A busy background behind body text is not.
Selecting Appropriate Colors and Contrasts
Contrast isn’t optional. It’s the difference between “I can read comfortably” and “I’m squinting.”
Best default: black text on white or cream. I’d start there unless you have a strong reason not to.
If you want a gentler contrast: dark navy or dark brown can feel easier than pure black for some readers. But here’s the catch—colors can shift slightly in print, especially on different paper stocks.
What I do to avoid glare surprises:
- Export a high-quality PDF from your layout tool.
- Print a short sample (one page of body text + one page with headings).
- Check it under the lighting your readers are likely to have (desk lamp vs overhead lighting can change what “looks okay” means).
If you’re using a tinted background, keep it light and test it. A tint that looks subtle on screen can make the text feel washed out once it’s printed.
Breaking Content into Manageable Sections
Large print readers don’t need “less information.” They need less visual strain per chunk.
Here’s what works well:
- Paragraph length: target 3–4 lines per paragraph.
- Use headings: make headings bigger and clearly spaced so readers can reset their eyes quickly.
- Lists and bullets: lists are your friend. They break long explanations into scannable points.
- White space: add breathing room around sections. It’s not wasted space—it’s readability.
One thing I learned the hard way: if you rely on “automatic” reflow without checking page breaks, you can end up with awkward orphan/widow lines (one line stranded at the top or bottom). In InDesign, you can tweak keep options. In Word, you can use paragraph settings like “keep with next” for headings.
Streamlining Layouts and Minimizing Distractions
Let me be blunt: the most readable large print books look almost boring. That’s a good thing.
Do this:
- Use a consistent page grid: same margins, same text frame width, same header/footer placement.
- Limit images and graphics. When you do include them, make sure they’re sized so the caption is readable too.
- Keep body text styling consistent. No random font switches, no different colors “just because.”
- Keep line length in the 50–60 character range so reading feels smooth.
What I noticed: busy backgrounds and heavy decorative borders made the text feel less sharp, even when the font size was correct. If the reader has to work to separate content from decoration, you’ve already lost.
Enhancing Accessibility Features for Large Print Editions
Accessibility isn’t just about font size. It’s also about navigation and consistency.
Practical accessibility upgrades that make a difference:
- Clear chapter titles with enough spacing above and below.
- Page numbers that are easy to find (I like them in a contrasting color and consistent position).
- Section markers (icons or simple labels) for notes/tips if your layout supports it.
- Digital versions with adjustable font sizes and working headings (screen readers rely on structure).
If you’re also thinking about how to keep production consistent (especially across multiple formats), you might find it helpful to look at workflow automation so your large print files don’t drift every time someone exports a new version.
Limitation to be aware of: tactile features like braille or raised markers require specialized production and planning. If that’s part of your scope, treat it as a separate formatting workflow, not an afterthought.
The Future of Large Print Publishing: Technology and Trends
Large-format printing is getting faster and more flexible, which matters for turnaround times and proofing cycles.
Digital printing keeps improving, and that tends to reduce the cost of running test copies—meaning you can validate your layout choices sooner. When you’re formatting large print, that’s huge, because small changes (like a slightly wider margin or a different tint) can have a big effect once it hits paper.
As for the broader market stats you may see floating around (like large-format printing market growth), I’d treat those as directional. The real implication for you is simpler: more printers and more workflows means more chances to proof properly, and fewer excuses to skip the test print.
Personalization is also becoming more common. If you’re planning custom editions (different font sizes, different front matter, or different cover variants), the workflow you choose now will determine how painful those changes are later.
Summary of Best Practices for Large Print Book Formatting
- Use clean, readable fonts like Arial, Verdana, or Times New Roman at 16–18 pt (test 18 pt for comfort).
- Set line spacing to 1.5x or double and keep margins wide (start around 0.75–1.0 inch).
- Break content into short paragraphs (aim for 3–4 lines) and use headings and lists to chunk information.
- Maintain high contrast—black/dark text on white or cream is the safest bet. Test any tint for glare.
- Keep the design simple and consistent. Predictability helps readers focus on the story, not the layout.
- Add navigation cues: larger chapter titles, clear section markers, and easy-to-find page numbers.
- Proof your PDF with a real print sample before you scale up. Screen-only checks can lie to you.
FAQs
A large print edition typically uses bigger fonts, increased spacing, and clearer layout (headings, page numbers, and navigational cues) to make reading easier for people with visual impairments or reading difficulties.
Increase font size (often 16–24 pt depending on your target), use readable fonts (Arial/Verdana/Times New Roman), and apply generous margins and spacing. Then format with consistent styles so the layout stays uniform across all pages.
Yes. You can update the typography and layout (font size, line spacing, paragraph structure, margins) and then re-export the files. The key is to keep formatting consistent so readers don’t get surprised by different styles from chapter to chapter.
Proper large print formatting reduces visual strain by improving readability—bigger type, better spacing, and high contrast help readers focus on the content instead of fighting the layout.