Table of Contents
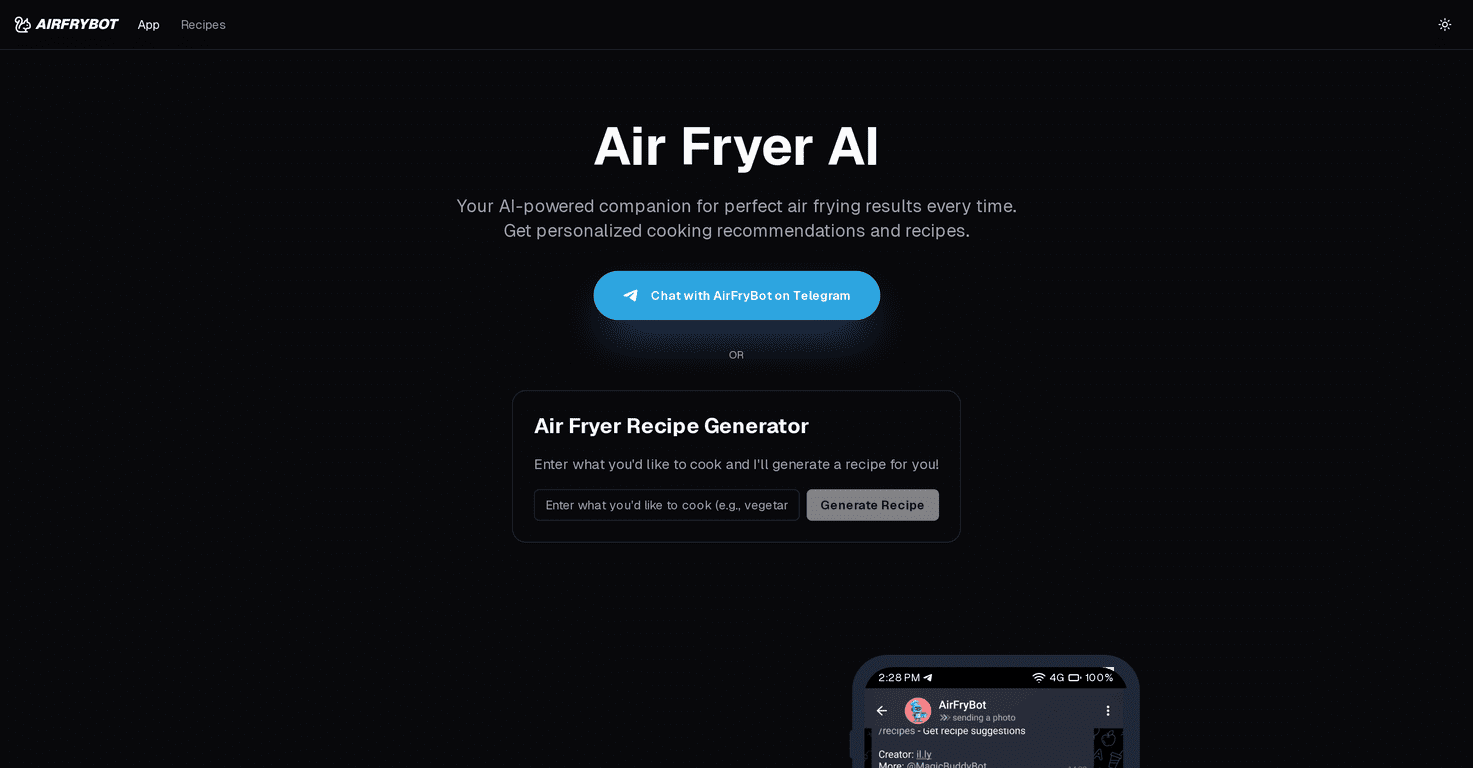
Cooking can sometimes feel overwhelming, especially when you’re unsure what to make with the ingredients at hand. Enter AirFryBot, a helpful AI-driven cooking assistant that’s here to simplify your meal prep. It promises to turn your random ingredients into mouth-watering dishes without the hassle of traditional cooking methods. Let’s delve into the capabilities of AirFryBot and see if it lives up to its promise.

AirFryBot Review
AirFryBot is an innovative tool designed for air fryer enthusiasts. What sets it apart from other cooking resources is its ability to generate personalized recipes based on photos of your ingredients. Just snap a pic and the AI instantly provides a tailored recipe, complete with photo-based instructions to guide you through the cooking process. This makes meal preparation accessible and easy, even for beginner cooks.
The diversity of recipes is another significant highlight. Whether you want to whip up crispy chicken wings, delicious appetizers, or even decadent desserts, AirFryBot has you covered. The AI not only suggests recipes but also provides precise cooking times and temperatures, ensuring that each meal turns out perfectly cooked.
However, while AirFryBot is fantastic for those with air fryers, it may not cater to individuals who prefer other cooking methods. Furthermore, the reliance on photos might sometimes lead to inaccuracies in recipe generation, particularly if the image is unclear. Yet, overall, the experience is smooth and encouraging for anyone looking to innovate in the kitchen.
Key Features
- AI Guidance for tailored recipes from ingredient photos
- Photo-based step-by-step cooking instructions
- Precise cooking times and temperature recommendations
- Wide variety of recipes from appetizers to desserts
- Completely free without any ads or interruptions
Pros and Cons
Pros
- User-friendly interface with instant recipe generation
- Encourages creativity with available ingredients
- Completely free with a focus on privacy
- Access to diverse and healthy air fryer recipes
Cons
- Limited to air fryer recipes only
- Photo dependency may occasionally yield inaccurate recipes
Pricing Plans
AirFryBot is 100% free. It promises a privacy-focused and ad-free experience.
Wrap up
In conclusion, AirFryBot is a fantastic ally for anyone looking to maximize their air fryer experience. With its innovative AI-driven recipe generation, a treasure trove of diverse recipes, and a user-friendly approach, it makes cooking an enjoyable adventure. So grab your ingredients, snap a photo, and let AirFryBot help you create delicious meals effortlessly!
Promote AirFryBot