Table of Contents
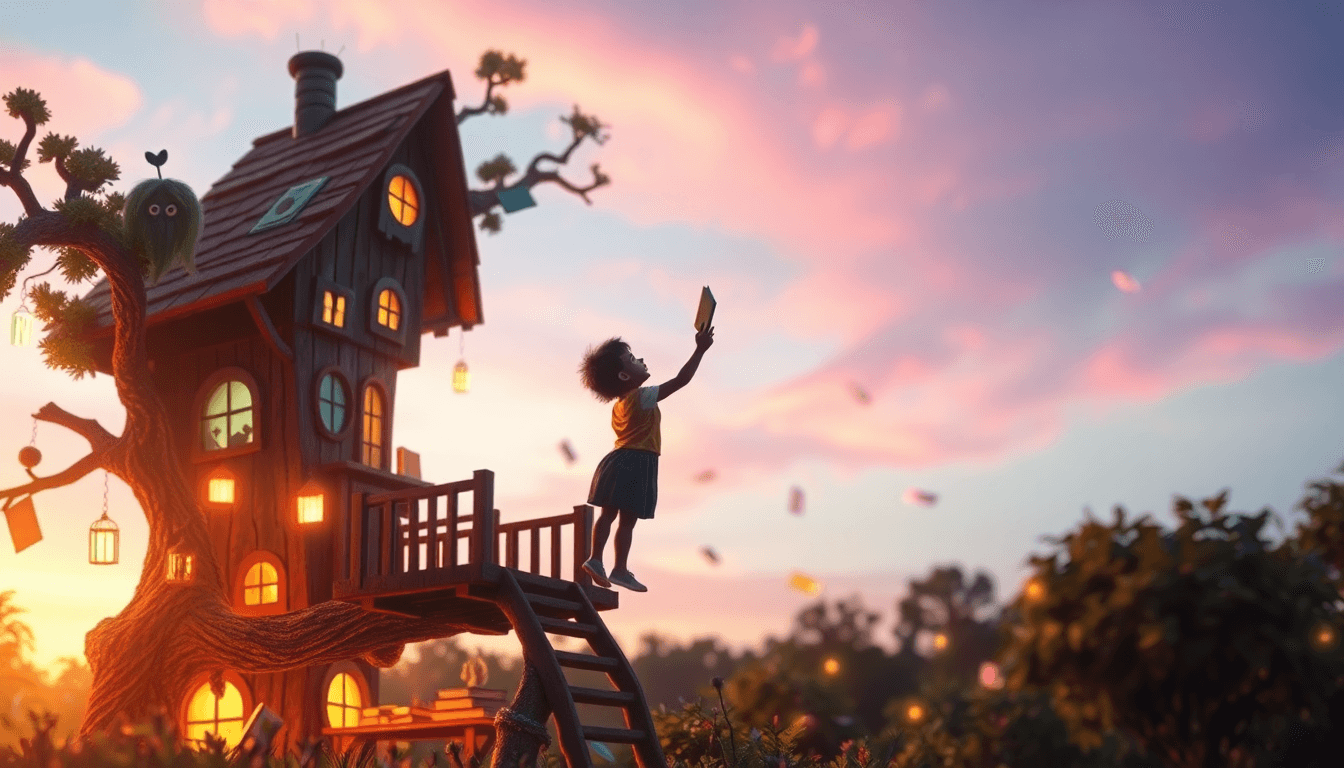
When you’re trying to get a children’s book illustrated, the big question is simple: how do you turn your words into pictures kids (and parents) actually want to look at?
In my experience, the difference between “cute” and “this looks like a real published book” comes down to planning, clear communication, and not cutting corners on the boring-but-important stuff like resolution, dimensions, and file handoffs.
⚡ TL;DR – Key Takeaways
- •Pick your illustration route (publisher vs. self-publishing) based on how much control you need and how much project management you can handle.
- •Before anyone draws a single page, lock down tone, style, page-by-page notes, and a revision plan—otherwise you’ll pay for rework.
- •Thumbnails first. Always. I’ve seen timelines blow up when people jump straight to “final” art too early.
- •For print, plan around 300 DPI and correct dimensions from day one. It saves you from ugly surprises at formatting time.
- •Use mockups and specific briefs to manage feedback. Vague notes lead to vague results—and more revision rounds.
Understanding Your Options for Children’s Book Illustration in 2026
Illustrating a children’s book isn’t one single process—it’s a decision about who’s steering the ship. In practice, you’ve got two main pathways:
- Work through a publisher (usually via their art director after your deal is secured).
- Self-publish and hire an independent illustrator directly.
Here’s what I noticed when helping authors compare the two: publisher routes can feel “easier,” but you trade control. Self-publishing feels more hands-on, but you get to choose the artist whose style actually matches your story.
With a publishing house, the art director typically matches your manuscript to an illustrator based on style fit and schedule. That can speed things up, but you’re often working within the publisher’s workflow, deadlines, and creative direction.
With self-publishing, you can hire a professional illustrator, a student with a strong portfolio, or a freelancer you find on platforms like Fiverr or PeoplePerHour. You also control things like:
- the art style references you want followed
- the number of revision rounds
- what “final” deliverables include (layers, formats, color profiles)
- how you’ll format for print or ebook
Self-publishing also opens the door to print-on-demand options such as Lulu and CreateSpace (availability and requirements vary over time). In other words: you can test the market without ordering 500 copies up front.
Budget-wise, I usually see illustration costs swing a lot depending on scope (number of spreads, character complexity, full-color vs. limited color), and the illustrator’s experience. It’s not unusual to land anywhere from a few hundred for smaller/limited projects to several thousand for seasoned illustrators doing full-color picture book work.

Planning Your Children’s Book Illustrations (So You Don’t Lose Months)
Before you contact any illustrator, you need two things: an emotional anchor and a visual direction.
The emotional anchor is your tone—cozy, adventurous, funny, gentle, spooky (but not too scary), etc. The visual direction is how the characters and scenes should look. If you can’t describe that clearly, the illustrator will fill in the blanks… and you might not like what they choose.
Start by defining your style guide (not just “whimsical vs. realistic”)
“Whimsical” is a vibe, not a style guide. What I recommend is doing a quick style research sprint and turning it into a one-page reference sheet.
Here’s a practical way to research:
- Look at 10–20 picture books in your age range and note what you see (line weight, color palette, character proportions, background detail).
- Save references by category: character design, backgrounds, lighting, expressions, and scene composition.
- Pick 3 “must match” references and 3 “no thanks” references.
Then translate that into a style sheet your illustrator can actually use. Include things like:
- Palette (example: warm earth tones with teal accents)
- Line weight (bold outlines vs. soft edges)
- Character proportions (big heads, small bodies, or more realistic human proportions)
- Texture level (smooth digital vs. watercolor grain)
- Lighting (golden hour, indoor soft light, night scenes, etc.)
Choose illustration types and plan your page count early
Full-page illustrations, spot illustrations, and vignettes all change the workload. A book with 32 pages and full-color spreads is a very different project than one with a few spot drawings per page.
Standard picture books often land around 32 or 40 pages, but your story might call for something else. The key is to tell the illustrator what you actually need, page by page.
For more on illustration planning and how it ties to production, see our guide on illustrated books creation.
Budget and timeline: build in real review time
Illustration timelines can easily stretch over several months, especially for full-color picture books. When people get burned, it’s usually not because the illustrator is slow—it’s because feedback is delayed or revisions are unclear.
What helps is setting a timeline that includes:
- an initial thumbnail approval window
- a sketch/draft approval window
- a final color/finish approval window
- buffer time for your revisions and any last-minute changes
If you want a structured way to plan this, tools like Illustrated Books Creation: 5 Simple Steps to Get Started can help you map out the basics without missing steps.
Step-by-Step: How to Illustrate Your Children’s Book (Even If You’re Not an Artist)
If you’re self-illustrating, you’ll still follow the same workflow professionals use—just with you as the artist and project manager.
1) Thumbnails first (layout, pacing, and “what happens where”)
Start with thumbnails. I mean tiny sketches—like, fast and rough. Doodle directly on your manuscript or printed pages so you can see how the text and images will share space.
Thumbnails help you answer questions like:
- Where does the character stand on the page?
- What’s the focal point in each scene?
- Does the illustration support the emotional beat, or fight it?
2) Move to rough sketches (and get approval before you overwork it)
Once the thumbnails feel right, create rough sketches at a size you can actually review. If you’re working traditionally, sketch smaller first, then scan.
One thing that matters for print is scanning at 300 DPI (or higher) when you digitize traditional work. Low-resolution scans can look fine on screen but fall apart during printing and formatting.
3) Build color samples before committing to final palettes
Color is where a lot of “almost right” projects go wrong. Before finishing every page, create a few color samples:
- skin tones / hair colors
- main background palette
- day vs. night lighting reference
- any special mood elements (fog, glow, moonlight)
In my experience, once you approve the palette, the rest of the book becomes way smoother.
4) Finish with print-ready files (and don’t skip the boring specs)
Final artwork typically needs to be high resolution—again, plan for 300 DPI—and sized to match your book format. If you’re aiming for something common like 8x10 inches for picture books, build around that from the start so you’re not resizing at the end.
Tools and Software for Children’s Book Illustration
Digital tools make it easier to iterate without losing your sanity. Traditional media (watercolor, acrylic, pencil) can work too—you just need a solid scanning and cleanup workflow.
Digital options you’ll see most often
For many illustrators, Adobe Photoshop and Adobe Illustrator are common because they handle layers and finishing well. If you want free or lower-cost options, tools like Sketchbook can work for sketching and painting.
Here’s the part I’m careful about: I don’t treat “software popularity” as a marketing claim. What matters is what you can do with the tool you choose—layers, brushes, file export formats, and how it fits into your workflow.
Also, if you’re using vectors for parts of the illustration (logos, simple shapes, some character elements), vector tools can help preserve quality when resizing.
For print-ready results, keep these rules front and center:
- 300 DPI minimum for print
- correct dimensions for your trim size
- consistent file exports (so formatting doesn’t turn into a scavenger hunt)
If you’re connecting illustration work to the production side of publishing, you might also like our guide on get book published.

Creating Mockups and Layouts (This Is Where Revisions Get Cheaper)
Mockups are one of those things people skip—then they regret it. A physical mockup is honestly underrated.
Try this: fold blank paper to match your book size, then sketch or paste text chunks and rough image blocks so you can see how it actually feels on a page. It’s hard to argue with a mockup you can hold.
Digital mockups: quick, layered, and review-friendly
Digital mockups can be made in layout software or even in Photoshop by using layers to position:
- text blocks
- image boundaries
- safe margins
- any bleed considerations your printer/publisher requires
The goal isn’t perfection. The goal is clarity. When everyone can see what page 7 “feels like,” you avoid late-stage surprises like “the character’s head gets cut off” or “the text doesn’t fit with the illustration.”
If you’re working with traditional art, a light table can also help you align sketches and keep compositions consistent across pages.
Managing Feedback, Revisions, and Final Artwork
Let’s be real: the review process is where most projects stall. Not because illustrators can’t draw—it’s because feedback is unclear or too late.
Use a structured revision workflow
Here’s a workflow that’s worked well for me and for the projects I’ve seen go smoothly:
- Round 1: thumbnail approval (fast changes only)
- Round 2: rough sketches approval (composition + character placement)
- Round 3: color + finish approval (tone, palette, lighting)
Set acceptance criteria like:
- Characters match the approved design sheet
- Expressions match the story beat
- Text-safe areas are respected
- Color palette matches approved samples
Vague vs. specific brief (copy/paste template)
Vague brief example:
“Make it nicer and more magical.”
Specific brief example:
- Style: same palette as reference #2, softer line weight
- Mood: hopeful, warm light, gentle glow around the character
- Details: add 3 small stars in the sky, keep the background uncluttered
- Text layout: no important elements behind the headline text area
Rushing revisions is a quality killer. If your illustrator delivers a sketch and you only have 20 minutes to respond, you’re basically guaranteeing extra rounds later. Plan time for feedback.
Finalizing: file organization matters
When finalizing, make sure the illustrator delivers print-ready files that match your production plan. At minimum, you want:
- 300 DPI artwork at the correct dimensions
- consistent file naming (so you don’t lose track of page order)
- organized layers if you’ll be formatting later
- clear exports (PNG/JPG/PDF as required by your printer/platform)
And yes—this is tedious. But it’s also how you avoid formatting mistakes that cost money.
Self-Publishing Your Illustrated Children’s Book (What Platforms Usually Require)
Self-publishing gives you control, but it also means you’re responsible for meeting platform specs. Don’t assume “it looks good on screen” will automatically translate to print.
When choosing platforms for illustrated books, look for services that support picture book formatting and provide clear templates/specs. Platforms like CreateSpace, Lulu, and BookBildr are commonly used, and you can use guides like get book published to understand the workflow.
File requirements that can trip you up
Most platforms care about things like:
- Resolution: typically 300 DPI for print
- Dimensions: must match trim size
- Color profiles: RGB vs CMYK expectations (check the platform)
- Bleed and margins: how close artwork can be to edges
- Interior vs cover: different requirements for each
One more practical tip: before you upload, do a quick “zoom test” on a few pages. If text looks jagged or edges look soft, that’s a sign your resolution or resizing isn’t right.
Automateed can help streamline formatting and publishing workflows, which reduces the chance of errors and helps you get from “final art” to “ready to upload” faster.
Also think about distribution and formats. Many platforms now support hardcover, paperback, and ebook versions, which makes it easier to reach different readers—without rebuilding everything from scratch.

Expert Tips for Getting Better Illustration Results (Without Overpaying)
If you want to find strong illustrators, communities can help. Groups like SCBWI and CANSCAIP are good places to start because you’ll see portfolios and industry conversations. And if you’re an author looking to collaborate, showing your style clearly helps artists self-select (which saves everyone time).
Know what you’re paying for
Illustration pricing varies widely. In general, you’re paying for:
- number of illustrations/spreads
- full-color vs limited color
- complex character design and background detail
- how many revision rounds are included
Student or newer illustrators can be a great value—especially if their portfolio matches your style. Just don’t assume they’ll know your production requirements. You’ll still want to review carefully and specify file deliverables.
Communication checklist (send this with your brief)
- Style references (3 “must match,” 3 “do not do”)
- Page-by-page notes (even short bullets help)
- Revision rounds you expect (example: 2 rounds per phase)
- File deliverables (PSD layered? JPG/PNG exports? naming rules?)
- Print specs (300 DPI, correct dimensions, any bleed/margin notes)
- Deadlines for your feedback (so the project doesn’t stall)
That last bullet is bigger than people think. If you want the illustrator to move fast, you need to respond fast.
Wrapping It Up: Turning Your Story Into Illustration You Can Publish
Getting your children’s book illustrated is rewarding—and yes, it’s a bit complex. But it doesn’t have to be stressful.
Plan your style and page needs up front. Use thumbnails and mockups so you’re not guessing. Be specific with feedback. And keep print standards (like 300 DPI) in mind from the start so the final formatting step doesn’t derail you.
If you’re also working on the production side, guides like get book deal can help you think about the bigger picture beyond just illustration.
Frequently Asked Questions
How do I illustrate a children’s book myself?
Start with thumbnails to map out scenes and page layout. Then create rough sketches at a size you can review comfortably. Once you’re happy with composition, move into detailed artwork and coloring using tools like Adobe Photoshop or Sketchbook. The key is to work at the right book size and resolution so your illustrations don’t fall apart when you export for print.
What tools are best for children’s book illustration?
Most illustrators use digital tools like Adobe Photoshop, Adobe Illustrator, or Autodesk Sketchbook for drawing and coloring. If you use traditional media, scan your work at a high resolution (plan for 300 DPI) and then clean up and color in your digital software. The “best” tool is the one that fits your workflow and export needs.
How much does it cost to get children’s book illustrations?
It varies a lot. You might pay a few hundred dollars for smaller projects or newer illustrators, and several thousand dollars for experienced illustrators doing full-color picture book work. The biggest cost drivers are the number of pages/spreads, complexity, and how many revision rounds are included.
Can I illustrate my children’s book for free?
It’s possible if you have the skills and time (and you already have art supplies or can use free software). But “free” usually comes with tradeoffs—time, learning curve, and the risk that the final art won’t meet print-ready quality. If you’re not already confident in illustration, you may end up spending later on revisions or rework.
What are the steps to publish a children’s book after illustrating?
First, make sure your illustrations are finalized at the correct resolution and dimensions for your book trim size. Then format your interior and cover according to your chosen platform’s requirements. Finally, upload, double-check a few pages at high zoom, order a proof copy if possible, and publish/distribute once everything looks right.