Table of Contents
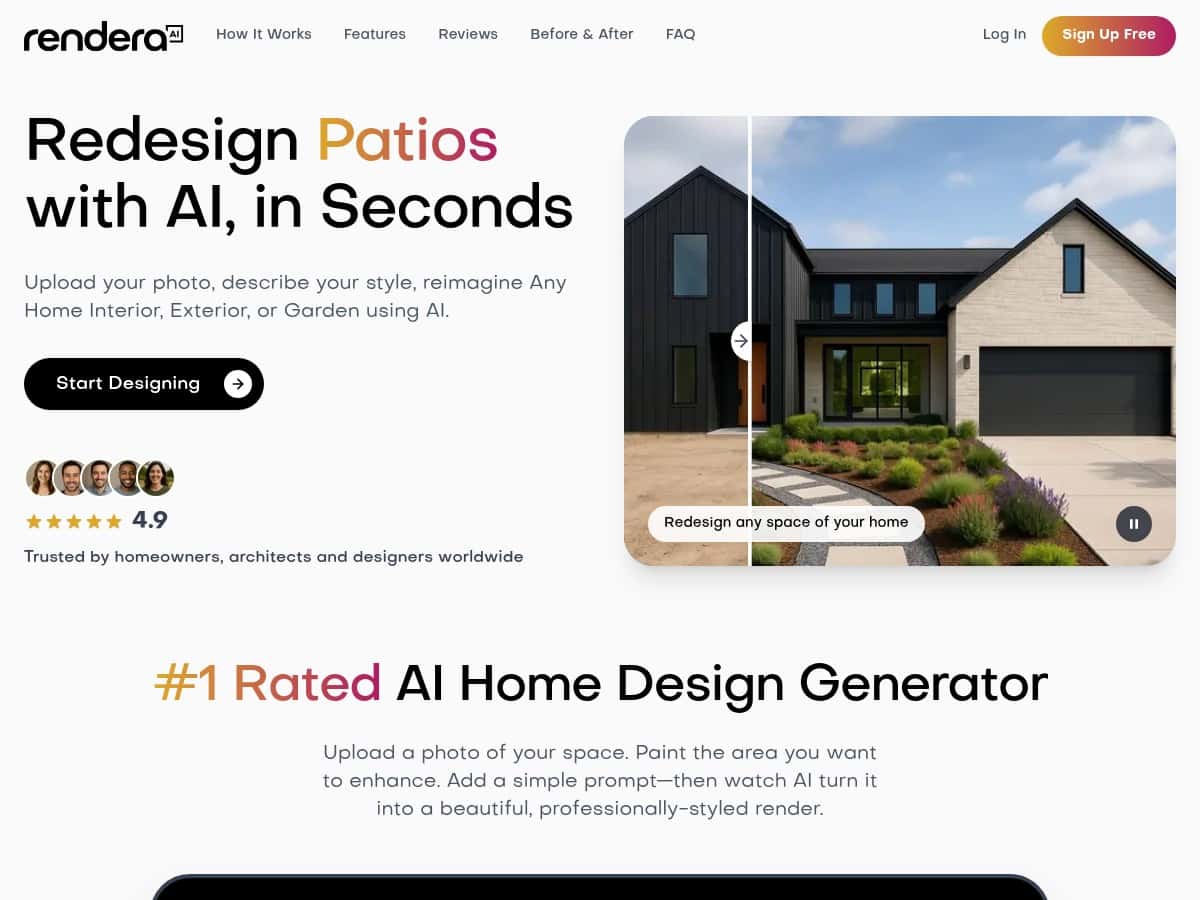
Ever upload a few home or garden photos and think, “Okay… but what would this actually look like with changes?” That’s exactly why I tried Rendera.ai. The pitch is simple: upload an image (or a sketch), get design-style renders back quickly, and iterate without needing Photoshop or a full-on 3D workflow.
In my experience, it’s one of the easier “photo-to-design-visual” tools to use. But how good is it really? I tested it on a couple of different inputs (a living room photo and a small garden/yard angle), tried multiple style options, and watched what happened with lighting, textures, and the overall realism.

Rendera.ai Review: What I Actually Got When I Tested It
I’m not going to pretend this is a replacement for full 3D modeling. What Rendera.ai is trying to do is faster: take your existing photo and generate a new “design look” that you can react to immediately.
Here’s what stood out in my tests:
- Upload → render loop is quick. I could try multiple styles without the long wait times I’ve experienced with heavier tools.
- Lighting and material choices looked consistent most of the time. In the room image, the shadows and wall finishes generally matched the direction and brightness of the original scene.
- Style matters. Some styles produced “wow” results, while others leaned a bit generic—more on that below.
Before/after realism (what I noticed): When I kept the camera angle similar (same photo, just different style prompts/options), the AI did a pretty good job with the “everything belongs together” feel—especially for things like wall color, flooring tone, and overall brightness. Where it struggled was in the micro-details: tiny patterns in upholstery, super crisp edges around trim, and extremely specific furniture shapes.
Example 1 (living room photo): I tested a modern-style option on a room image. What I liked: the render kept the space feeling natural, and the lighting didn’t look pasted on. What I didn’t love: some elements looked slightly “smoothed,” like the AI was making a best guess rather than preserving every exact feature.
Example 2 (garden/yard angle): For the outdoor input, the biggest difference was how the greenery and landscaping elements were interpreted. The results felt cohesive, but the plant variety wasn’t always what I’d expect if I were designing for a specific climate. If you’re picky about region-specific landscaping, you’ll want to double-check the output and iterate.
Failure cases (real talk): If your original photo is dark, heavily overexposed, or blurry, the AI has less to work with. In my case, the renders still looked “designed,” but the realism dropped—textures got flatter and the shadowing could look a little off. Garbage in, garbage out… just like any image-based workflow.
One more thing: I also tried changing style options rather than drastically changing the scene. That’s when I got the most convincing results. If you ask for huge transformations, you may get a render that looks good but doesn’t match your original layout as tightly.
Key Features (and How They Work in Practice)
- Custom Design Generation from photos or sketches
If you’re starting from a photo, the tool uses your image as the foundation. Sketch support (where available) is helpful if you’re not ready to take photos yet, but the results will still depend on how clearly your sketch communicates the space. - AI-Powered High-Quality Rendering
In plain terms: it generates a new design interpretation and tries to keep it believable. In my tests, “high-quality” mostly showed up in lighting consistency and overall scene cohesion. The sharpness on small details wasn’t always perfect, though—think upholstery patterns, thin edges, and intricate textures. - Context-Aware Designs (local architecture + climate)
This is the feature I was most curious about. “Context-aware” doesn’t mean it magically knows everything about your property from one photo. What it does well is adapt the design choices so they don’t feel totally random. In practice, it’s more like: it makes educated adjustments so the style fits the environment you’re showing.
What I noticed: when my outdoor scene looked like a typical residential yard, the render generally produced landscaping that fit that vibe. But when I was expecting very specific climate-appropriate plant types, the output sometimes didn’t match exactly. If the tool lacks clear location/climate info (or if the input photo doesn’t provide strong cues), you may need to refine by iterating styles or adding more direction. - Renderings typically completed in under 30 seconds
The “under 30 seconds” claim is believable based on my experience, but it’s not instant on every run. With a stable connection, my renders came back quickly enough to feel like a real workflow (try a style, review, adjust). If your internet is spotty, expect delays because it’s cloud-based. - Pay-as-you-go credit system
This is important: you’re not locked into a monthly subscription. You pay for what you generate. That’s great for occasional use, and it also means you can experiment without worrying about a “subscription tax.”
Quick practical tips I’d actually use:
- Use photos with clear lighting. Bright but not blown-out images helped the renders look more natural.
- Keep the camera angle consistent. If you want comparable results, don’t constantly switch between super wide and super close shots.
- Try 2–3 styles before you judge. One style might underperform, but another gets much closer to what you want.
- For outdoor designs, be specific. If you care about plant types or seasonal look, don’t assume it will nail it automatically—check and iterate.
Pros and Cons (Based on My Runs)
Pros
- Fast iteration. I could generate multiple design options quickly enough to explore ideas without losing momentum.
- Simple interface. It’s not a complicated tool. I didn’t have to watch a tutorial just to get my first render.
- No monthly subscription. Pay-as-you-go credits make it easier to test the tool for a single project.
- Often believable lighting + materials. The renders generally felt like they belonged in the original space—especially when the input photo had decent exposure.
- “Context-aware” is useful, not perfect. It helps the output feel more aligned with the environment you show, rather than totally random styling.
Cons
- Credits can add up if you’re generating constantly. If you’re doing dozens of variations, costs will rise faster than you think. (I’d treat it like “design exploration,” not an unlimited creative playground.)
- Cloud-based means internet dependency. If your connection is unreliable, your workflow slows down.
- Not every detail is accurate. Expect occasional “almost right” elements—especially with fine textures and very specific design elements.
- Free/trial details weren’t clear enough for me to quote exactly here. I didn’t want to guess on credit amounts or trial duration. If you’re considering it, check the current free tier/credit offer on the site before you commit.
Pricing Plans: Pay-As-You-Go Credits (What to Expect)
Rendera.ai uses a credit-based approach. In other words: you buy credits and spend them when you generate renders. There’s no recurring monthly fee, which is honestly one of the biggest reasons I like credit systems for tools like this.
How I’d think about cost: If you’re generating just a handful of concepts (say, 5–15 renders for one renovation idea), it’s usually manageable. If you’re a power user testing tons of variations every week, the credit usage can become the main factor you watch.
My recommendation: Before you start a big session, decide what you’re trying to achieve. Pick 2–3 styles you want to explore, generate those, then only go deeper if the results are actually close to what you’re imagining.
Wrap up
Rendera.ai is a solid option if you want quick, realistic-ish visualizations without learning professional design software. My best results came when the input photos were clear and when I used style changes that didn’t radically alter the scene. The tool feels fast and user-friendly, and the pay-as-you-go setup makes it easier to try without committing to a subscription.
If you’re the kind of person who needs exact, construction-level accuracy, you’ll still want a proper design workflow after. But for brainstorming, early-stage concepts, and getting a “does this direction work?” answer quickly? It does the job.