Table of Contents
Feeling stuck with your story? Honestly, plot outlines can seem intimidating, especially when staring down a blank page. You’re not alone—many writers find structuring their story overwhelming.
But don’t worry! With the right outline templates, your story planning can be simple, fun, and even creative. Stick around, and you’ll soon have all the tools you need to make your storytelling life easier and clearer.
Ready? Let’s break down how you can pick templates, plan outlines quickly, and organize your ideas visually, step-by-step.
Key Takeaways
- Choose a story outline template that fits your writing, whether it’s a simple three-act structure or a specialized genre template.
- Use a simple one-page outline to quickly map your story’s main situation, conflict, key events, and ending.
- Follow a clear 7-step method including protagonist, conflict, stakes, supporting characters, key plot points, subplots, and adjustments.
- Map scenes visually using index cards or visual storyboard tools to easily spot gaps and shuffle events.
- Review famous authors’ outlines online for inspiration on structure and pacing.
- Adjust and update your outline flexibly as you write, keeping the story fluid and engaging.

Step 1: Pick a Plot Outline Template That Works for Your Story
If you’re thinking about sitting down to write a novel or short story, the first useful thing to consider is choosing the right plot outline template. There are plenty of template options depending on your story type—including the classic three-act structure, the hero’s journey, or even something more niche like a cozy murder mystery. Matching your story idea to an outline that fits can save you a ton of headaches later by giving you clear signposts as you write.
To make your choice easier, think about the kind of story you’re planning. For instance, if you’re writing a dystopian story with intricate world-building, using templates like Save the Cat’s beat sheet or the hero’s journey can help you focus on critical turning points. On the other hand, if you’re crafting a straightforward romance or contemporary story with strong character arcs, a simple three-act outline can easily keep you organized.
Your template shouldn’t limit you—it should simply help guide your creative process. The goal here is clarity, not rigidity. Choose a template that feels right and helps you move forward rather than getting you stuck in overly complicated formulas.
Step 2: Use a Simple One-Page Template for Quick Planning
Once you’ve picked the outline structure, keeping your planning short and sweet can make the writing process feel a lot less overwhelming, especially at the start. That’s why many authors prefer using just a simple one-page plot outline when they’re kicking off a new story idea. This is sometimes called a “beat sheet” or “one-page synopsis,” and it helps you map out key points without bogging you down in tiny details.
To craft your own one-page outline, follow these simple tips:
- Write a single sentence describing the opening situation of your story.
- Briefly describe the main conflict your character will face.
- Jot down three or four critical turning points or plot developments.
- State clearly how your story ends—your final outcome or resolution.
If you want additional inspiration, you can snag free one-page templates through platforms championed by writing groups or check out outlining software like Plottr, which is popular among authors for its simplicity and flexibility. Creating a one-page outline is often enough to reassure you that your idea is complete, interesting, and ready for you to dive into an enjoyable first draft.
Step 3: Follow a 7-Step Method to Create Your Outline
You’ve chosen your template, gotten a quick overview of your story, and now it’s time to connect all the dots with an effective outlining method. The 7-step method is especially handy because it builds your outline logically, step by step, so you’re not stuck staring at a blank page.
Here’s exactly how you can use it:
- Nail down your protagonist: Write down their goal, motivation, and what’s holding them back.
- Define your central conflict: Clearly describe what main obstacle your character must overcome.
- Establish stakes and consequences: Spell out what happens if your protagonist fails—this ramps up reader investment.
- Develop supporting characters: Briefly outline secondary characters’ roles so they’re not just placeholders.
- Create pivotal plot points: Identify major scenes like the inciting incident, midpoint twist, climax, and resolution.
- Add depth with subplots: Map out one or two related storylines to enrich your main narrative and weave them into the structure.
- Review and rearrange as needed: Once you have your full outline, look for any weak points or pacing problems, and adjust scenes accordingly.
By following these practical steps, creating a detailed, engaging outline becomes much easier and far less intimidating. Another bonus? An outline like this can help you avoid abandoning your work halfway through and ensures you deliver a satisfying conclusion readers will enjoy, whether they’re into contemporary romance, historical fiction, or even exploring horror story plot ideas.
Step 4: Organize Your Scenes Using Visual Plot Outlines
Wondering how to keep track of what happens where without losing your cool? One practical solution that many writers swear by is using visual plot outlines to map your scenes visually.
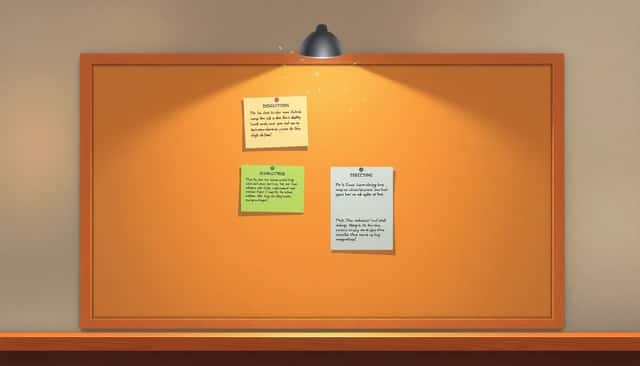
Tools like Milanote allow you to arrange your story scenes as movable cards on a visual storyboard, similar to pinning notes to a corkboard (minus the thumbtack punctures).
The best part about this visual approach? You can quickly drag scenes around, reorder events, and spot story holes that you probably wouldn’t notice from a purely text-based outline.
If you’re more hands-on, grabbing real index cards is still a solid, low-tech approach—lay your deck on a table and shuffle scenes until you’ve nailed the storytelling flow.
Whether digital or analog, visually mapping your plot saves you from confusing timelines and embarrassing continuity errors that eagle-eyed readers love to point out.
Step 5: Find Outline Templates Created for Your Genre
Wondering if there’s an easier way to structure a story that’s spot-on for your genre? Good news: specialized plot outline templates exist for almost every type of book imaginable.
For example, mystery authors often use a beat sheet template specifically tailored to clue distribution and misdirection, a huge help if you’re crafting tricky horror story plot twists or unraveling murder mysteries.
Writers tackling dystopian fiction can use unique templates or even a dystopian plot generator to shape distinctive world-building elements.
Platforms like Plottr are excellent because they offer templates crafted by other successful authors from all kinds of genres, saving you from guesswork.
Bottom line, a genre-specific outline takes away the stress of missing essential story beats your readers anticipate, making writing smoother and your storytelling stronger.
Step 6: Review Examples of Famous Story Outlines
Wondering how famous authors organize their plots so effectively? You’re in luck—plenty of successful writers’ story outlines are open resources you can learn from.
Authors like J.K. Rowling have shared parts of their original outlines online, offering a rare glimpse at how famous favorite books were initially planned.
Taking time to study these examples can give you ideas for organizing your own story, refining pacing, or even solving a tricky narrative problem you’re facing.
Reading detailed breakdowns of popular published narrative outlines can clarify where to place dramatic turning points, character developments, or pivotal reveals in your narrative structure.
Just remember, these examples are teaching tools, not templates; you can get inspired without feeling pressured to match someone else’s approach exactly.
Step 7: Customize and Adjust the Outline as You Write Your Story
Can you change the outline while you’re still writing? Absolutely— and you probably should.
No outline survives the actual writing completely intact, and that flexibility is important because characters evolve and story directions naturally shift.
Don’t feel locked in if the plot takes an unexpected turn—just revisit your visual plot board or notes on software like Scrivener, Plottr, or even Google Docs.
Make real-time modifications and keep your outline up-to-date as the story progresses.
This flexibility also means letting go of ideas that no longer fit or adding new twists as you write, ultimately delivering a more engaging, surprise-filled story that’s true to your vision.
By actively adjusting the outline on-the-go, you avoid feeling stuck and maintain ongoing clarity about where your story is heading, making finishing your first draft way more likely (and a lot more fun).
FAQs
A one-page plot outline template helps quickly structure story ideas, clarify the main plot points, and maintain focus. It prevents overplanning and allows writers to begin drafting quickly without getting overwhelmed in excessive detail.
Visual plot outlines let writers map scenes graphically, making it easier to spot gaps, track character development, and maintain pacing. This visual method supports clarity, highlights connections, and enhances logical flow throughout the story.
You can find genre-specific plot outline templates on writing resource websites, blogs dedicated to writing tips, or through specialized software designed for authors. These templates align directly with genre conventions to support your storytelling.
No, the outline acts as a flexible guide rather than a rigid structure. Writers frequently adjust their outlines as new ideas, characters, or subplots unfold during the writing process, enhancing creativity and improving the final story.