Table of Contents
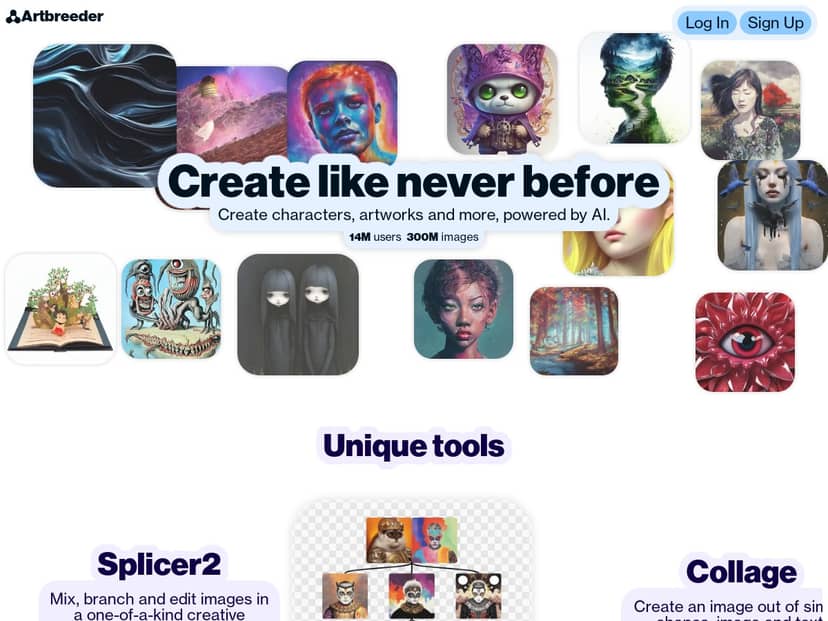
I’ve been messing around with AI image tools for a while, so when I came across Artbreeder, I wanted to see if it was actually as easy (and creative) as people make it sound. What I liked right away is that it doesn’t feel like you have to be a designer or understand a bunch of complicated settings. You’re basically steering the image with sliders and then iterating until it looks right.
In my testing, I spent most of my time on portraits and face variations—because that’s where Artbreeder’s “tweak and remix” vibe really shines. I also tried blending a couple of reference images to see how much control you really get, and I tested the text-to-image side for quick style prompts. I’ll be honest: some results were jaw-dropping, and some were… not. But the process is fun, and once you learn which controls matter, you can get consistent outcomes.
Artbreeder Review: What I Actually Did (and What Happened)
My first test with Artbreeder was simple: I started with a base portrait and then used the sliders to push the image toward a specific vibe. I’m not going to pretend it’s magic—what you’re really doing is steering a model that already knows how to “compose” faces. The sliders are the difference between getting something decent and getting something that looks like it belongs in a magazine.
Here’s what I noticed after a couple of sessions:
- Speed to first result: I was getting usable outputs pretty quickly. Even if I didn’t love the first generation, I could usually find something worth saving after a handful of iterations.
- Slider behavior: Small slider changes often produce subtle differences (hair texture, facial proportions, lighting). Bigger jumps are where you start seeing more dramatic transformations—and more weird artifacts.
- When it looks “off,” it’s usually specific: In my runs, the most common issues were mismatched facial symmetry, odd eye placement, and hair edges that looked slightly melted into the background. If I backed off and nudged the traits more gradually, the quality improved.
Next, I tried blending images. This is where Artbreeder feels most “hands-on.” I picked two images that were similar in lighting and angle (same general head tilt), because that’s what most people don’t mention: if your references are wildly different, the blend can fight you. When I used closer references, the output looked more coherent. When I used very different references, I still got interesting results, but they were less “portrait-ready.”
Finally, I tested text-to-image prompts to see if it’s actually useful or just a gimmick. For quick experiments, it’s great. I used simple prompts like “portrait, soft studio lighting, neutral background” and then leaned on the image controls to refine the result. If you’re expecting the prompt alone to produce a perfect final image, you’ll probably be disappointed. If you treat prompts as a starting point (then iterate), it works much better.
So does Artbreeder live up to the hype? For me, yes—especially for portraits, style exploration, and remixing ideas. But it’s not a “set it and forget it” tool. You’ll get the best results when you’re willing to iterate and pay attention to what each slider is doing.
Key Features: How They Work in Real Life
- Blending multiple images for unique creations
I tested blending by choosing two portrait images with similar framing. After combining them, I adjusted the blend balance and re-generated a few variations. What I noticed: coherent results came when the references shared the same general lighting and angle. If you blend two totally different “styles” (like studio portrait + heavy illustration), you can get cool hybrid looks, but faces sometimes distort more often. - Adjusting image traits with easy-to-use sliders
This is the core of Artbreeder. Instead of trying to describe every detail in a prompt, you tweak traits directly. In my testing, the sliders that affected structure (face shape and proportions) had the biggest impact, while others influenced texture (skin/hair detail). My best workflow was: make one meaningful change, generate, evaluate, then repeat—rather than moving five sliders at once and hoping for the best. - Generating images from text descriptions
I used text prompts as a way to “nudge” the model toward a direction, then refined with trait controls. Text alone can get you into the right neighborhood fast, but it rarely nails every detail on the first try. If you want consistent portrait results, plan on iterating. - Collaborative community for sharing and remixing
The community aspect isn’t just social fluff. I found it helpful because you can remix starting points that already look good. Instead of starting from scratch, you borrow a base and then push it in your direction. That saves time, especially if you’re aiming for a specific aesthetic. - Tools for collage and precise image editing
I didn’t spend hours here, but I did test basic editing/collage-style workflows. What stood out: it’s more “assistive” than fully professional (you’re still working inside Artbreeder’s generative system), so don’t expect Photoshop-level control. Still, for quick compositions, it’s surprisingly handy. - Optional animation and video features for premium users
I tried to see how far I could get with the animation/video side, and this is one of the first places where paywalls show up. In my experience, the free experience focuses on generating and exporting still images, while the more advanced motion features require a subscription. If animation is a priority, keep that in mind before you invest time.
Pros and Cons: What I Liked vs What Slowed Me Down
Pros
- Fun, iterative workflow: I didn’t feel stuck staring at a blank prompt box. The slider approach makes it easier to experiment.
- Great for portraits and style exploration: I got the most consistent “wow” moments from face/portrait variations, especially when I kept references similar.
- Community remixing helps you learn faster: Instead of guessing, you can start from something someone already tuned.
- Beginner-friendly interface: You can get results without being technical. I didn’t need tutorials to understand the basics.
- Variety: Even within portrait categories, you can push toward different vibes—more realistic, more stylized, different lighting moods.
Cons
- Unpredictability is real: It’s not just “random.” In my runs, aggressive slider moves increased the odds of artifacts—especially around eyes, hairline edges, and facial symmetry.
- Learning curve for getting “good” outputs: If you don’t iterate strategically, you’ll burn through credits/time on near-misses. My fix was slower changes + saving intermediate versions.
- Export/download limits on free tiers: You may be able to generate plenty, but exporting at higher quality (or multiple downloads) can be restricted depending on plan.
- Some advanced features are paywalled: Animation/video tools showed up as premium, so if you want motion outputs, you’ll need to plan for that cost.
Pricing Plans: What to Expect (Without Guessing)
Artbreeder does offer a free plan, but it comes with limitations—mainly around credits and what you can export/download. In practice, that means you can absolutely try the platform, but you’ll hit walls if you’re trying to generate high volumes or export the best-looking results at the highest quality.
For paid plans, the big differences are typically:
- More credits / more generations (so you can iterate without constantly waiting)
- Higher resolution downloads (important if you’re using images for posts, prints, or portfolio work)
- Access to extra tools like advanced export options and motion features
One thing I don’t want to fake: exact current prices can change. The most reliable approach is to check the plan page directly on Artbreeder before you commit. If you want, I can help you sanity-check which plan fits your goal (portraits vs. lots of experimenting vs. animation)—just tell me what you’re trying to create.
Wrap up
After testing Artbreeder, my take is pretty straightforward: it’s one of the more enjoyable AI art tools because it doesn’t make you fight the interface. The slider-based trait control is genuinely useful, and the remix/community side helps you improve faster than pure trial-and-error.
Just go in with realistic expectations. Expect to iterate. Expect some weird artifacts if you push sliders too hard. And if you care about animation/video or high-resolution exports, you’ll likely end up looking at a subscription. Still, if you want a creative sandbox for portraits and style exploration, Artbreeder is absolutely worth your time.